Banana Bliss No-Bake Pudding Bars

WANT TO SAVE THIS RECIPE?

Indulge in Sweetness: Banana Bliss No-Bake Pudding Bars Recipe

Introduction

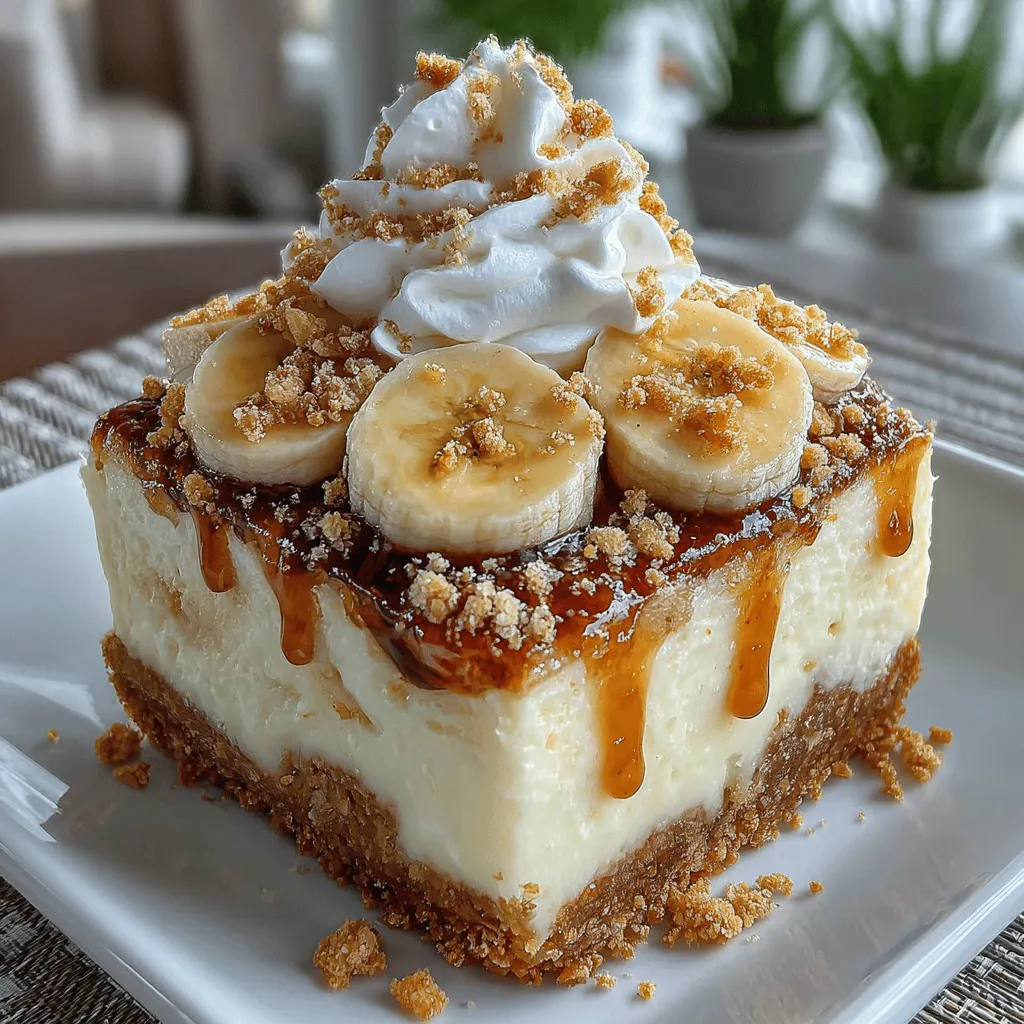
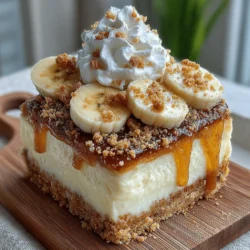
If you’re on the hunt for a dessert that perfectly balances effortless preparation with indulgent flavor, look no further than our Banana Bliss No-Bake Pudding Bars. This delightful dessert combines the smooth, creamy texture of vanilla pudding with the natural sweetness of ripe bananas, all elegantly layered atop a crunchy, buttery graham cracker crust. The best part? This recipe requires no baking, making it an ideal option for those warm, sunny days when turning on the oven feels like a chore or for impressing guests without the stress of traditional baking.

In this article, we will guide you through the process of crafting these heavenly pudding bars step by step. Whether you’re hosting a summer barbecue, celebrating a birthday, or simply satisfying a sweet tooth, these Banana Bliss No-Bake Pudding Bars promise to be a crowd-pleaser that will leave everyone asking for more.

Understanding the Appeal of No-Bake Desserts

The Convenience of No-Bake Recipes

No-bake desserts have taken the culinary world by storm, and for good reason. They offer a time-saving alternative to traditional baking, eliminating the need for preheating ovens and reducing cleanup. This approach not only simplifies the process but also creates desserts that are often lighter and more refreshing, making them particularly appealing during warmer months.

With no-bake recipes, you can whip up a delicious treat in a matter of minutes, allowing you to spend more time enjoying the company of friends and family instead of being tethered to the kitchen. The Banana Bliss No-Bake Pudding Bars are a perfect example of this convenience, providing a delightful dessert option that requires minimal effort yet delivers maximum satisfaction.

The Versatility of Banana Pudding

Banana pudding is a beloved classic that transcends generations. It evokes feelings of nostalgia, comfort, and home-cooked warmth, making it a favorite dessert for many. The creamy and rich flavor of banana pudding is enhanced by layers of fresh bananas, creating a delightful contrast that appeals to both young and old alike.

This versatile dessert can be dressed up or down, making it suitable for casual gatherings or more formal occasions. The Banana Bliss No-Bake Pudding Bars take the traditional banana pudding experience and elevate it to new heights, offering a fun, portable dessert that’s perfect for any event.

Ingredients Breakdown

The Foundation: Graham Cracker Crust

At the base of our Banana Bliss No-Bake Pudding Bars lies a delicious graham cracker crust. This crust provides a sweet, crunchy foundation that perfectly complements the creamy filling. The graham cracker crumbs, combined with melted unsalted butter and granulated sugar, create a delightful contrast in texture and flavor. The choice of unsalted butter is essential, as it allows for better control over the sweetness of the crust, while the sugar adds just the right amount of sweetness to enhance the overall experience.

To achieve a sturdy crust, it’s important to press the mixture firmly into the bottom of your baking dish. This step not only ensures that your bars hold together well when sliced but also enhances the flavor by allowing the crust to blend seamlessly with the creamy filling above.

The Creamy Filling: Pudding and Whipped Cream

The star of our dessert is undoubtedly the creamy filling, which combines instant vanilla pudding mix and whole milk to create a luscious texture. The instant pudding mix is a game-changer, allowing you to achieve that rich, creamy consistency without any cooking involved. When mixed with whole milk, it transforms into a velvety pudding that serves as the backbone of your pudding bars.

For added lightness and airiness, we incorporate heavy whipping cream whipped with powdered sugar. This fluffy layer not only enhances the flavor of the bars but also adds an extra touch of elegance. The combination of these ingredients creates a filling that is both rich and refreshing, making each bite a heavenly experience.

The Star of the Show: Fresh Bananas

Of course, we can’t forget about the bananas—the true stars of our recipe. Using ripe bananas is crucial, as their natural sweetness and creamy texture elevate the flavor profile of the pudding bars. Ripe bananas not only provide sweetness but also contribute to the overall creaminess of the filling, ensuring that every bite is packed with banana goodness.

In addition to their delightful taste, bananas are also a healthy addition to this dessert, offering essential vitamins and minerals that help balance out the sweetness of the pudding and crust. By incorporating fresh bananas into our no-bake pudding bars, we create a dessert that is not only indulgent but also has a hint of wholesome goodness.

Step-by-Step Instructions

Preparing the Crust

To begin your journey to creating the Banana Bliss No-Bake Pudding Bars, you’ll first need to prepare the graham cracker crust. Start by gathering your ingredients: graham cracker crumbs, unsalted butter, and granulated sugar. In a medium mixing bowl, combine the graham cracker crumbs and sugar, mixing them thoroughly to ensure even distribution.

Next, melt the unsalted butter in a small saucepan or microwave. Once melted, pour the butter into the graham cracker mixture and stir until the crumbs are evenly coated. The mixture should resemble wet sand, with the butter binding the crumbs together.

Now, it’s time to transfer the mixture into your chosen baking dish. Use a spatula or your hands to press the graham cracker mixture firmly into the bottom of the dish, creating an even layer. Make sure to pack it tightly; this step is vital for ensuring that your crust holds its shape when sliced. Once the crust is nicely pressed down, set it aside to firm up while you prepare the creamy filling.

Stay tuned for the next part of our article, where we’ll dive into creating the delicious pudding filling and layering the bars with fresh bananas.

<strong>Introduction</strong>” /></p>
</p>
<h2>Making the Pudding</h2>
</p>
<p>To create the creamy filling for your Banana Bliss No-Bake Pudding Bars, start by preparing the instant pudding mix. Using instant pudding not only simplifies the process but also ensures a delightful texture. In a large mixing bowl, combine the instant banana pudding mix with cold milk. For best results, use a whisk to mix the ingredients vigorously for about 2 minutes. The key here is to whisk thoroughly until the mixture thickens and is smooth without any lumps. This should take no more than a couple of minutes, making it an effortless step.</p>
</p>
<p>Once the pudding reaches the desired thickness, set it aside to allow the flavors to marry while you prepare the next steps. The pudding will continue to thicken slightly as it sits, resulting in a luscious, creamy filling perfect for your dessert bars.</p>
</p>
<h2>Whipping the Cream</h2>
</p>
<p>In a separate bowl, take the heavy cream and begin to whip it using an electric mixer. Start on a low speed for about 30 seconds, then gradually increase to medium-high speed. This gradual increase prevents splattering and helps incorporate air evenly into the cream. Continue to whip the cream until it forms stiff peaks, which should take approximately 3 to 5 minutes. Stiff peaks mean that when you lift the whisk, the peaks stand straight up without collapsing.</p>
</p>
<p>Once your cream is whipped, it’s time to fold it into the pudding mixture. Use a rubber spatula to gently combine the two, taking care not to deflate the whipped cream. This folding technique is crucial as it retains the airiness of the cream, giving your pudding bars a light and fluffy texture. Aim for a marbled appearance, where the pudding and cream are blended but not completely uniform. This ensures every bite is a delightful combination of flavors and textures.</p>
</p>
<h2>Layering the Dessert</h2>
</p>
<p>Now comes the fun part—layering your dessert! Start by preparing an 8×8-inch baking dish, ensuring it is clean and dry. First, spoon a layer of the pudding mixture into the bottom of the dish, spreading it evenly. Then, place a layer of fresh banana slices over the pudding. The banana slices not only add a sweet flavor but also create visual appeal with their bright yellow color.</p>
</p>
<p>Next, repeat the layering process. Add another layer of pudding on top of the bananas, followed by more banana slices. Depending on your preference and the amount of pudding, you can create two or three layers. For the final touch, top it off with any remaining pudding mixture, smoothing it out to create an even surface.</p>
</p>
<p>This layering not only enhances the aesthetic appeal but also ensures that every slice of the Banana Bliss No-Bake Pudding Bars has a perfect balance of banana and creamy pudding.</p>
</p>
<h2>Chilling for Perfection</h2>
</p>
<p>Chilling is a crucial step in the process. Cover your layered dessert with plastic wrap or aluminum foil and place it in the refrigerator for at least four hours, although overnight is preferable. This chilling period allows the pudding to set properly, ensuring that the bars hold their shape when cut. The flavors will meld together beautifully during this time, enriching the overall taste of the dessert.</p>
</p>
<p>While waiting, you can prepare any additional toppings or garnishes you wish to include for serving, making the most of your time.</p>
</p>
<h2>Serving Suggestions and Presentation</h2>
</p>
<h3>Creating an Enticing Display</h3>
</p>
<p>Once your Banana Bliss No-Bake Pudding Bars have set, it’s time to present them in a way that will impress your guests. For an enticing display, consider adding a dollop of whipped topping on each slice. You can also place a few extra banana slices on top for a fresh touch.</p>
</p>
<p>For added texture and visual appeal, sprinkle crushed graham crackers over the bars just before serving. The crunch of the graham crackers complements the smooth pudding beautifully, adding an extra layer of flavor that enhances the overall experience.</p>
</p>
<p>Using a sharp knife, cut the bars into squares or rectangles, wiping the knife with a damp cloth in between cuts for cleaner edges. Arrange the bars on a serving platter, and don’t forget to provide spoons or forks for easy serving.</p>
</p>
<h3>Pairing Options</h3>
</p>
<p>To elevate your dessert experience, consider pairing the Banana Bliss No-Bake Pudding Bars with complementary beverages or light dishes. Iced tea, particularly unsweetened or lightly sweetened varieties, pairs beautifully with the sweetness of the pudding bars, offering a refreshing contrast. If you prefer something fruity, a light fruit salad made with seasonal fruits can enhance the flavors and add freshness to the meal.</p>
</p>
<p>For those who enjoy a bit of coffee, a chilled latte or a light cappuccino can also be a delightful accompaniment, bringing a sophisticated touch to your dessert table.</p>
</p>
<h2>Nutritional Information</h2>
</p>
<h3>Caloric Breakdown</h3>
</p>
<p>Now, let’s take a moment to discuss the nutritional aspects of your Banana Bliss No-Bake Pudding Bars. Each serving, depending on the portion size, contains a balance of carbohydrates, fats, and proteins, making them a satisfying treat. The primary ingredients include bananas, instant pudding mix, heavy cream, and graham crackers, each contributing to the overall nutritional profile.</p>
</p>
<p>On average, a single serving may contain approximately 200-250 calories, with a significant portion coming from natural sugars found in bananas and the cream. While it’s important to enjoy these bars in moderation, they can be part of a balanced diet when served as an occasional treat.</p>
</p>
<h2>Conclusion</h2>
</p>
<p>In conclusion, the Banana Bliss No-Bake Pudding Bars are a delightful combination of flavor and texture that are easy to prepare and perfect for any occasion. With their creamy filling and delightful crunch, they are sure to please both adults and children alike. Whether you are hosting a gathering or simply treating yourself, this recipe is a must-try. Embrace the joy of no-bake desserts and savor the sweetness of bananas in every bite.</p>
</p>
<p>These bars not only promise a delightful taste experience but also offer a visual feast that is sure to impress. So gather your ingredients, follow these simple steps, and enjoy the deliciousness of Banana Bliss No-Bake Pudding Bars. Your friends and family will thank you, and you might just find yourself making these again and again!</p>
</div>

Introduction

No-Bake Banana Pudding Bars

Discover the joy of treating yourself with our Banana Bliss No-Bake Pudding Bars. This simple yet indulgent dessert combines creamy vanilla pudding, ripe bananas, and a buttery graham cracker crust for a delightful treat. Perfect for warm days or impressing guests, these bars are easy to prepare and require no baking. Follow our step-by-step guide to create layers of flavor that will leave everyone asking for more. Get ready to savor every delicious bite!

Ingredients
  

2 cups graham cracker crumbs

1/2 cup unsalted butter, melted

1/4 cup granulated sugar

2 cups whole milk

1 (3.4 oz) package instant vanilla pudding mix

1 cup heavy whipping cream

1/4 cup powdered sugar

3 ripe bananas, sliced

1 teaspoon vanilla extract

1 cup whipped topping (optional, for garnish)

Extra banana slices and crushed graham crackers for topping

Instructions
 

Prepare the Crust: In a mixing bowl, combine the graham cracker crumbs, melted butter, and granulated sugar. Mix until the crumbs are evenly coated. Press the mixture firmly into the bottom of a greased 9x9-inch baking pan to form an even layer. Set aside.

    Make the Pudding: In another bowl, whisk together the milk and instant vanilla pudding mix for about 2 minutes, or until it thickens.

      Whip the Cream: In a separate mixing bowl, use an electric mixer to beat the heavy whipping cream and powdered sugar until stiff peaks form. Add the vanilla extract and gently fold the whipped cream into the pudding mixture until well combined.

        Layer the Bars: Pour half of the pudding mixture over the graham cracker crust and spread it evenly. Arrange a layer of banana slices on top of the pudding. Pour the remaining pudding over the bananas and spread it out gently.

          Chill: Cover the baking pan with plastic wrap and refrigerate for at least 4 hours, or overnight, to let the bars set properly.

            Serve: Once chilled and set, remove the bars from the refrigerator. If desired, top with whipped topping, additional banana slices, and a sprinkle of crushed graham crackers for added texture. Cut into squares and serve chilled.

              Prep Time: 20 minutes | Total Time: 4 hours 20 minutes | Servings: 9 servings

                WANT TO SAVE THIS RECIPE?

                Leave a Comment

                Recipe Rating