
Introduction
For cookie enthusiasts, few things are as delightful as biting into a warm, freshly baked chocolate chip cookie. However, the thought of preparing cookie dough from scratch can feel daunting, especially when unexpected guests drop by or late-night cravings strike. Enter the concept of cookie dough discs—an innovative and convenient solution that allows you to have ready-to-bake cookie dough on hand at all times. The Chill Out Chocolate Chip Cookie Dough Discs recipe is designed with simplicity and deliciousness in mind, making it the perfect choice for anyone who loves cookies but craves convenience.
Imagine having a stash of perfectly portioned cookie dough discs tucked away in your freezer, ready to be transformed into warm, gooey cookies with minimal effort. This method not only saves time but also ensures that you can indulge in homemade treats whenever the mood strikes. Whether you prefer a classic chocolate chip cookie or enjoy experimenting with various add-ins, these discs provide the flexibility to customize each batch to your liking.
In this article, we will delve into the delightful world of Chill Out Chocolate Chip Cookie Dough Discs, exploring the ingredients that make them irresistible and guiding you through the initial steps of preparation.
Understanding the Ingredients
To craft the perfect cookie dough discs, it’s essential to understand the role of each ingredient in the recipe. Let’s explore the key components that contribute to the flavor, texture, and overall deliciousness of these cookie dough discs.
Unsalted Butter
At the heart of any great cookie recipe is the fat, and unsalted butter is the star in this case. Using softened unsalted butter is crucial for achieving an optimal texture. The softening process allows the butter to cream more easily with the sugars, resulting in a light and fluffy base that promotes a tender cookie texture. Unsalted butter also gives you control over the amount of salt in your cookies, allowing for a more balanced flavor profile.
Sugars
The combination of granulated and brown sugars is essential for achieving the perfect sweetness and chewy texture in your cookies. Granulated sugar contributes to the crispiness of the cookie edges, while brown sugar, with its higher moisture content, adds a delightful chewiness and depth of flavor. The molasses in brown sugar not only enhances sweetness but also imparts a subtle caramel-like taste that pairs beautifully with chocolate.
Vanilla Extract
Vanilla extract is a key ingredient that elevates the overall flavor profile of the cookies. Its warm, sweet notes complement the richness of the butter and the sweetness of the sugars. A splash of pure vanilla extract can transform a simple cookie into something truly special, making it an indispensable addition to your cookie dough.
Eggs
Eggs play a vital role in cookie dough, providing moisture and structure. When incorporated into the mixture, eggs help bind the ingredients together, resulting in a cohesive dough. They also contribute to the cookies’ rise and texture. For the best results, it’s important to use large eggs at room temperature, as this allows for better integration with the other ingredients.
Flour and Leavening Agents
All-purpose flour is the foundation of the cookie dough, providing structure and stability. The right balance of flour ensures that the cookies have the ideal texture—soft yet sturdy enough to hold their shape. Baking soda acts as a leavening agent, helping the cookies rise during baking, while a pinch of salt enhances the overall flavor by balancing the sweetness.
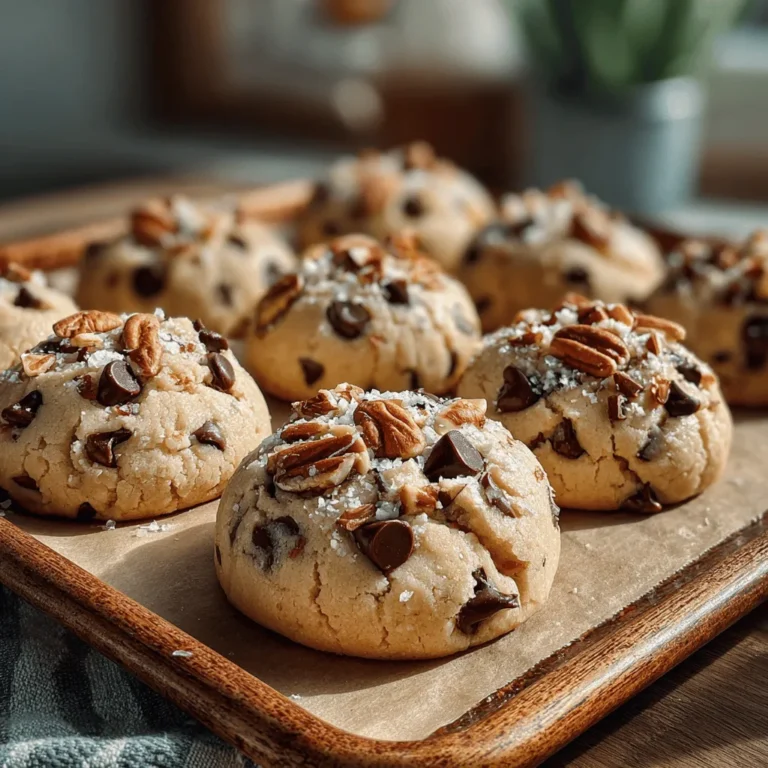
Chocolate Chips and Nuts
No chocolate chip cookie is complete without its star ingredient: chocolate chips. Semi-sweet chocolate chips are a classic choice, providing a rich, melty contrast to the sweet dough. For those who enjoy added texture, incorporating nuts—such as walnuts or pecans—can bring an extra crunch and depth to each bite. The combination of chocolate and nuts creates a delightful harmony of flavors, making each cookie a satisfying treat.
Step-by-Step Instructions for Perfect Discs
Now that we’ve covered the essential ingredients, let’s dive into the step-by-step process for preparing your Chill Out Chocolate Chip Cookie Dough Discs. Following these instructions carefully will ensure you achieve the best results, resulting in perfectly shaped and delicious cookies every time.
Creaming the Sugars
Begin by creaming the softened unsalted butter with the granulated and brown sugars in a large mixing bowl. Using an electric mixer, beat the mixture on medium speed until it becomes light and fluffy, which typically takes about 2-3 minutes. This step is crucial, as it incorporates air into the butter, giving your cookies a lighter texture. Scrape down the sides of the bowl as needed to ensure even mixing.
Incorporating Wet Ingredients
Once the butter and sugars are creamed together, it’s time to add the eggs and vanilla extract. Add the eggs one at a time, mixing on low speed until just combined. This gradual incorporation helps prevent overmixing, which can lead to tough cookies. After the eggs are well integrated, pour in the vanilla extract and mix until fully combined.
Combining Dry Ingredients
In a separate bowl, whisk together the all-purpose flour, baking soda, and salt. This step is important for ensuring that the leavening agents are evenly distributed throughout the flour. Gradually add the dry mixture to the wet ingredients, mixing on low speed until just combined. Be careful not to overmix at this stage; the goal is to combine the ingredients without developing too much gluten.
Folding in Add-ins
Now it’s time to add the chocolate chips and any optional nuts. Using a spatula or wooden spoon, gently fold the chocolate chips and nuts into the dough. This method helps to avoid overmixing, which can result in tough cookies. Aim for an even distribution of chocolate and nuts throughout the dough for a balanced flavor in each bite.
Forming and Chilling Discs
Once your cookie dough is fully mixed, it’s time to shape it into discs. Divide the dough into equal portions, approximately two tablespoons each, and roll them into balls. Then, flatten each ball into a disc shape (about ½ inch thick) for uniform baking. Place the discs on a parchment-lined baking sheet, leaving space between each one to allow for spreading during baking.
After forming the discs, it’s beneficial to chill the dough in the refrigerator for at least 30 minutes before freezing. Chilling the dough enhances the flavors and helps the cookies maintain their shape while baking. Once chilled, you can transfer the discs to the freezer for longer storage, allowing you to whip up fresh cookies whenever the craving strikes.
By following these initial steps and understanding the importance of each ingredient, you’ll be well on your way to creating delicious Chill Out Chocolate Chip Cookie Dough Discs. Stay tuned for the next part of this article, where we’ll discuss baking tips and creative variations to elevate your cookie game even further.
The Freezing Process: Convenience at Its Best
One of the standout features of the Chill Out Chocolate Chip Cookie Dough Discs is their exceptional convenience. Freezing cookie dough discs not only allows you to have fresh cookies on demand but also provides a straightforward method to store your homemade treats for later enjoyment.
Storing for Later
When it comes to freezing your cookie dough discs, proper storage is key to preserving their flavor and texture. Here are some best practices to follow:
1. Form the Discs: After preparing your cookie dough, portion it into evenly-sized discs (about 1.5 inches in diameter) and place them on a parchment-lined baking sheet.
2. Flash Freeze: Place the baking sheet in the freezer for about an hour, or until the discs are completely firm. This step prevents the discs from sticking together when stored.
3. Wrap and Store: Once frozen, transfer the discs into an airtight container or a resealable freezer bag. Be sure to label the bag with the date and contents, as this will help you keep track of how long they’ve been stored.
4. Storage Duration: For the best quality, use the frozen cookie dough discs within three months. While they may still be safe to eat beyond this period, the taste and texture could begin to diminish.
Baking Directly from Frozen
One of the best perks of freezing cookie dough discs is the ability to bake them directly from the freezer. There’s no need to thaw! Here’s how to do it:
1. Preheat Your Oven: Set your oven to 350°F (175°C). Preheating is crucial for achieving the perfect cookie texture.
2. Arrange on Baking Sheet: Line a baking sheet with parchment paper and place the frozen disc cookies a few inches apart. They will spread out as they bake.
3. Adjust Baking Time: When baking from frozen, add an extra 2-3 minutes to the baking time. Typically, you’ll want to bake them for about 12-15 minutes, but keep an eye on them.
By following these steps, you can have delicious, freshly-baked cookies ready to enjoy with minimal effort.
Baking the Perfect Cookie Discs
Baking these cookie discs to perfection is an art. Here are the key factors to consider for achieving the ideal texture and flavor.
Oven Temperature and Baking Time
Preheating your oven is a critical step that should never be overlooked. Setting it to 350°F (175°C) ensures even cooking, which is essential for a well-baked cookie.
1. Baking Time: For the best results, aim for 12-15 minutes of baking time. However, ovens can vary, so it’s important to start checking around the 10-minute mark.
2. Use of Baking Stones: If you have a baking stone, consider placing it in the oven while preheating. This tool can help maintain a consistent temperature, leading to better cookie results.
Visual Cues for Doneness
Knowing when your cookies are perfectly baked is crucial for achieving that delectable soft center and slightly crispy edges.
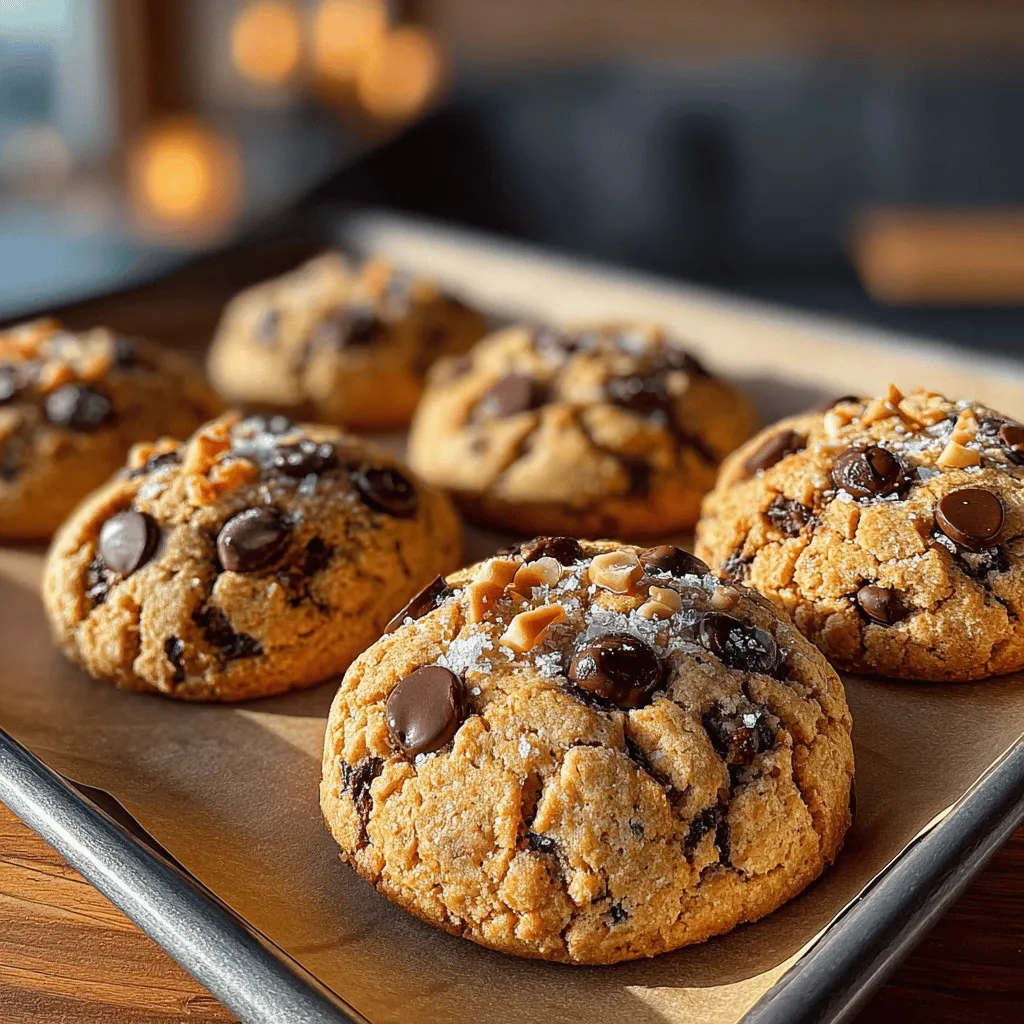
1. Color: Look for a light golden-brown color around the edges. The center may appear a bit underbaked, which is perfectly acceptable as the cookies will continue to cook slightly after being removed from the oven.
2. Edges and Center: The edges should be set, while the center remains soft and slightly puffy. If the cookies are browning too quickly on the edges, you may need to reduce the oven temperature slightly for future batches.
3. Cooling: Once removed from the oven, let the cookies cool on the baking sheet for a few minutes before transferring them to a wire rack. This allows them to firm up and makes them easier to handle.
Serving Suggestions and Variations
Once your Chill Out Chocolate Chip Cookie Dough Discs are baked to perfection, the fun continues with numerous serving suggestions and variations to explore.
Pairing with Ice Cream
One of the most delightful ways to enjoy your freshly baked cookies is to serve them warm with a scoop of ice cream. The combination of warm, gooey cookies and cold, creamy ice cream creates a dessert experience that’s hard to beat.
1. Classic Pairing: Vanilla ice cream is a timeless choice, but feel free to experiment with flavors like cookies and cream or mint chocolate chip for an exciting twist.
2. Ice Cream Sandwiches: For a fun, handheld treat, turn your cookies into ice cream sandwiches. Simply place a scoop of your favorite ice cream between two cookies and enjoy!
Chocolate Drizzle or Sprinkle
Elevate the presentation and flavor of your cookies by adding a drizzle of melted chocolate or a sprinkle of sea salt:
1. Melted Chocolate: Melt some chocolate in a microwave-safe bowl, then drizzle it over the cookies using a fork for a decorative touch. This adds a rich flavor boost to your already delicious cookies.
2. Sea Salt Sprinkle: A light sprinkle of flaky sea salt on top of the warm cookies enhances the sweetness and creates a delightful contrast that cookie lovers adore.
Flavor Variations
Don’t hesitate to get creative with your cookie dough discs! Here are some flavor variations to consider:
1. Different Types of Chocolate: Incorporate white chocolate chips, dark chocolate chunks, or even butterscotch chips into the dough for varied flavor combinations.
2. Spice It Up: Add a dash of cinnamon, nutmeg, or even espresso powder to the dough for a unique flavor profile. For instance, a hint of cinnamon can add warmth and depth to your cookies.
3. Nut Add-ins: Consider folding in chopped nuts, such as walnuts or pecans, for added crunch and texture.
Nutritional Insights
While indulging in delicious cookies is a treat, it’s also important to be mindful of nutritional aspects.
Calories and Portion Size
On average, a single Chill Out Chocolate Chip Cookie Disc contains about 120 calories. However, this can vary based on the size of the discs and specific ingredients used.
1. Enjoying in Moderation: To fully enjoy your cookies without overindulging, consider portioning out a few discs at a time rather than devouring them all at once. Pairing them with a glass of milk or a warm beverage can also help you savor the experience.
Ingredient Substitutions
If you’re looking to make your cookies a bit healthier without sacrificing flavor, consider these ingredient substitutions:
1. Whole Wheat Flour: Swap out half of the all-purpose flour for whole wheat flour to increase fiber content.
2. Reduced Sugar: You can decrease the sugar amount slightly, especially if you’re adding sweet toppings like chocolate drizzle or ice cream.
3. Butter Alternatives: For a dairy-free option, replace regular butter with coconut oil or vegan butter, allowing you to cater to various dietary preferences without compromising taste.
Conclusion
Having a stash of homemade Chill Out Chocolate Chip Cookie Dough Discs in your freezer is a game-changer for any cookie lover. This recipe not only offers the convenience of baking fresh cookies at a moment’s notice but also guarantees delicious, melt-in-your-mouth treats that you can enjoy any time.
Whether you’re pairing them with ice cream, drizzling chocolate on top, or experimenting with flavor variations, the possibilities are endless. Embrace the art of cookie baking and elevate your dessert game with this easy and satisfying recipe. Get ready to enjoy warm cookies that will delight your taste buds and satisfy your sweet cravings, all while celebrating the joy of homemade goodness. Happy baking!
