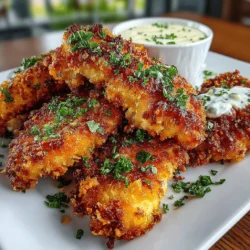

Crispy Air Fryer Chicken Tenders Recipe: A Delicious Twist on a Classic Favorite
Chicken tenders are a beloved staple in many households, celebrated for their tender meat and crispy exterior. These delectable strips of chicken are often found on menus ranging from fast food joints to gourmet restaurants. Their universal appeal lies in their versatility and ability to please both adults and children alike. Whether served as a main course, a party appetizer, or a snack, chicken tenders are always a hit.
In recent years, the rise of healthier cooking methods has introduced the air fryer to home kitchens, revolutionizing the way we prepare our favorite fried foods. Air frying allows you to achieve that coveted crispy texture while significantly reducing the amount of oil needed. This means you can enjoy the same great taste of traditional fried chicken tenders without the guilt. The air fryer not only cuts down on calories but also makes cooking and cleanup a breeze.
This crispy air fryer chicken tenders recipe marries the classic comfort of chicken tenders with the modern convenience of air frying. With its easy preparation and customizable flavor options, this recipe is perfect for busy weeknights or casual get-togethers. The result is a dish that boasts a crunchy exterior, juicy interior, and the ability to adapt to your preferred flavor profiles.
Understanding the Ingredients
To create the ultimate crispy air fryer chicken tenders, it’s essential to use quality ingredients that enhance both flavor and texture. Let’s take a closer look at the main components of this recipe.
Chicken Breast
The star of the show is, of course, the chicken breast. This lean protein choice is not only nutritious but also incredibly versatile. Chicken breast is low in fat and high in protein, making it an ideal option for those seeking a healthier diet. When cooked properly, chicken breast can be juicy and flavorful, serving as the perfect base for this recipe. The key is to marinate it well, allowing it to absorb flavors and stay tender throughout the cooking process.
Buttermilk
One of the secret weapons in achieving mouthwatering chicken tenders is buttermilk. Marinating chicken in buttermilk not only helps to tenderize the meat but also infuses it with rich flavor. The acidity in buttermilk breaks down the proteins in the chicken, resulting in a more succulent texture. Additionally, buttermilk contributes to the overall taste profile, making your chicken tenders irresistibly delicious.
Spices and Seasonings
Flavor development is crucial in any chicken recipe, and this one is no exception. A blend of spices and seasonings elevates the taste of the chicken tenders to new heights. Common ingredients such as garlic powder, paprika, onion powder, salt, and pepper come together to create a well-rounded flavor base.
– Garlic Powder adds a subtle yet distinctive flavor that enhances the overall savory profile.
– Paprika contributes a mild sweetness and a beautiful color to the breading.
– Onion Powder offers a hint of sweetness and depth.
– Salt and Pepper are essential for balancing the flavors of the spices and enhancing the natural taste of the chicken.
Panko Breadcrumbs vs. Regular Breadcrumbs
When it comes to achieving that perfect crispy texture, the type of breadcrumbs you use makes a significant difference. Panko breadcrumbs are coarser and lighter than regular breadcrumbs, allowing for a crunchier finish when baked or air-fried. Their unique texture creates air pockets that crisp up beautifully in the air fryer, ensuring your chicken tenders have the delightful crunch that everyone loves.
Dipping Sauce Ingredients
No chicken tenders are complete without a delicious dipping sauce. In this recipe, we’ll prepare a simple yet flavorful sauce that perfectly complements the crispy chicken.
– Mayonnaise serves as the creamy base of the sauce, providing a smooth texture and rich flavor.
– Dijon Mustard adds a tangy kick that balances the richness of the mayonnaise.
– Honey introduces a touch of sweetness, creating a harmonious contrast against the tanginess.
– Lemon Juice brightens the flavor, enhancing the freshness of the sauce and making it a perfect accompaniment to your chicken tenders.
Marination Process
Marinating your chicken in buttermilk is a crucial step that shouldn’t be overlooked. This process not only enhances the flavor but also ensures that the chicken remains juicy and tender after cooking. Here’s a step-by-step guide on how to effectively marinate your chicken tenders for optimal flavor:
1. Prepare the Buttermilk Mixture: In a large bowl, combine buttermilk with salt, pepper, and your chosen spices. Whisk until well combined.
2. Add the Chicken: Place the chicken tenders in the buttermilk mixture, ensuring they are fully submerged. This will allow the buttermilk to penetrate the meat effectively.
3. Cover and Refrigerate: Cover the bowl with plastic wrap or a lid and refrigerate. For best results, marinate the chicken for at least 2 hours, but overnight is ideal. The longer the chicken sits in the buttermilk, the more flavorful and tender it will become.
4. Remove and Drain: When ready to cook, remove the chicken from the refrigerator, allowing it to come to room temperature for about 15 minutes. This helps the chicken cook evenly. Drain excess buttermilk from the chicken before proceeding to the breading process.
Breading Technique
Achieving that perfect crispy coating involves a two-step breading process that ensures maximum crunch. Here’s how to do it:
1. Set Up Your Breading Station: Prepare three shallow dishes: one with flour, one with beaten eggs, and one with panko breadcrumbs mixed with your chosen spices.
2. Dredge the Chicken: Begin by taking a marinated chicken tender and dredging it in the flour. Ensure it’s fully coated, shaking off any excess.
3. Dip in Egg: Next, dip the floured chicken into the beaten eggs, allowing any excess to drip off. This step helps the panko adhere better to the chicken.
4. Coat in Panko: Finally, press the chicken into the panko breadcrumb mixture, ensuring it is evenly coated on all sides. The panko breadcrumbs will create the crispy exterior when cooked.
By following these initial steps, you’re on your way to creating crispy air fryer chicken tenders that will impress anyone at your dinner table. The combination of the marinated chicken, perfectly seasoned breading, and the air fryer’s cooking magic will yield a dish that is both delicious and healthier than traditional fried options. Stay tuned for the next part, where we’ll dive into the air frying process and tips for achieving the best results!
In the realm of quick and satisfying meals, crispy air fryer chicken tenders reign supreme. This delicious dish is not only a crowd-pleaser but also a healthier alternative to traditional fried chicken. In this section, we will delve into essential techniques for achieving that perfect crunch, crafting a delightful dipping sauce, and serving up your tenders in a way that will impress everyone at the table.
Importance of Flour for Adhesion and Panko for Crunch
When it comes to making crispy chicken tenders, the choice of coating is crucial. The combination of all-purpose flour and panko breadcrumbs creates a texture that is both flavorful and satisfying. The flour acts as an adhesive, ensuring that the panko adheres well to the chicken. This is essential for creating that signature crunch when cooked in the air fryer.
How to Achieve an Even Coating
Achieving an even coating on your chicken tenders is key to ensuring that every bite is crispy and delectable. Here are some techniques to help you:
1. Pressing: After dredging the chicken in flour, ensure that you press down gently but firmly. This helps the flour stick better to the chicken, creating a solid base for the panko coating.
2. Shake Off Excess: Once you coat the chicken in flour, shake off any excess before moving on to the next step. This prevents clumping and ensures that the panko can create an even layer around the chicken.
3. Double Dipping: For an extra-crispy finish, consider dipping the floured chicken back into the egg mixture and then back into the panko. This creates a thicker, crunchier coating that will hold up beautifully in the air fryer.
Air Frying for Perfect Texture
Air frying is a game-changer when it comes to cooking chicken tenders. It allows for a crispy finish without the excess oil associated with traditional frying. Here’s how to ensure you achieve the perfect texture:
Explanation of Preheating the Air Fryer
Preheating your air fryer is a critical step that should not be overlooked. By preheating to the desired cooking temperature (usually around 400°F), you ensure that the chicken tenders begin cooking immediately upon contact. This helps lock in moisture while creating a crispy exterior, resulting in tender, juicy chicken on the inside.
Tips for Arranging Chicken Tenders
When placing your chicken tenders in the air fryer basket, keep these tips in mind for even cooking:
– Single Layer: Arrange the tenders in a single layer without overcrowding the basket. This allows hot air to circulate freely around the chicken, ensuring that they cook evenly on all sides.
– Space Between Pieces: Leave some space between each tender. This is essential for achieving that crispy texture, as it prevents steaming and allows for optimal air circulation.
Cooking Times and Temperatures
Cooking times may vary depending on the thickness of your chicken tenders and the specific model of your air fryer. Generally, chicken tenders should be cooked at 400°F for about 10-12 minutes. To ensure they are fully cooked:
– Internal Temperature Guide: Use a meat thermometer to check the internal temperature of the chicken. It should reach a minimum of 165°F for safe consumption. This ensures that your chicken is both safe to eat and perfectly juicy.
Making the Dipping Sauce
No chicken tender experience is complete without a flavorful dipping sauce. Here’s how to whip up a simple yet delicious sauce that pairs beautifully with your crispy chicken tenders.
Step-by-Step Instructions for Preparing the Dipping Sauce
1. Base Ingredients: Start with a base of mayonnaise and yogurt or sour cream for a creamy texture. Use about ½ cup of each.
2. Flavoring: Add 1 tablespoon of Dijon mustard and 1 tablespoon of honey for a sweet and tangy kick.
3. Spice It Up: Incorporate 1 teaspoon of garlic powder and 1 teaspoon of paprika for added flavor. Whisk everything together until smooth.
4. Adjust to Taste: Season with salt and pepper to taste. Feel free to adjust the honey or mustard according to your preference for sweetness or tang.
Discussion of Variations for the Sauce
Customization is key when it comes to dipping sauces. Experimenting with different ingredients can elevate your sauce to new heights:
– Herbs and Spices: Mix in fresh herbs like dill or parsley for a fresh twist. Alternatively, add a pinch of cayenne pepper for heat.
– Citrus Zest: A little lemon or lime zest can brighten the flavors and add a refreshing note.
– Unique Flavors: Consider adding a splash of hot sauce or Worcestershire sauce for depth and complexity.
Importance of Balancing Flavors
A well-rounded dipping sauce should have a balance of creamy, tangy, and spicy elements. This enhances the overall flavor profile of your chicken tenders, making each bite a delightful experience.
Serving Suggestions
Crispy chicken tenders are incredibly versatile and can be served in various ways. Here are some ideas for serving:
Ideas for Serving Chicken Tenders
– Classic Pairings: Serve with classic sides like French fries or coleslaw for a traditional meal.
– Healthy Options: Pair with a fresh garden salad or steamed vegetables for a lighter option.
– Fun Snacks: Serve them in a platter with a variety of dipping sauces for a fun appetizer at parties.
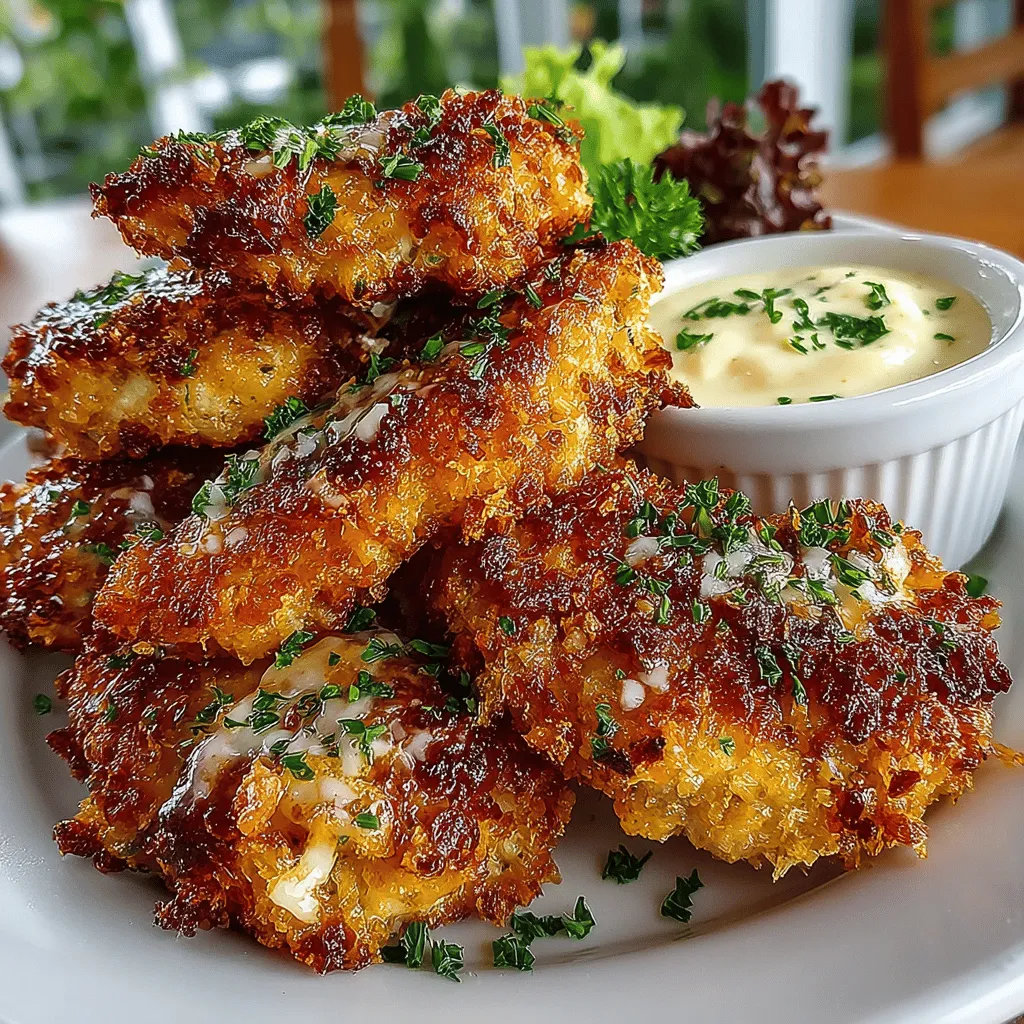
Presentation Tips
Presentation can elevate your dish from simple to stunning. Here are some tips for plating your chicken tenders:
– Use a Clean Plate: Start with a clean, large plate or platter to give your tenders room to shine.
– Garnish: Add a sprinkle of fresh herbs, like parsley, or a dash of paprika on top for color.
– Sauce on the Side: Serve the dipping sauce in a small bowl on the plate or in a ramekin to keep it separate from the tenders.
Discussing the Versatility of Chicken Tenders
Chicken tenders are not just for kids; they can be a delightful addition to any meal. They can be enjoyed as a main dish, finger food for gatherings, or even sliced and added to salads or wraps for a protein boost.
Nutritional Information
Understanding the nutritional benefits of your meal can help you make informed choices, especially when it comes to chicken tenders.
Overview of Nutritional Benefits
– Protein-Rich: Chicken tenders are an excellent source of lean protein, essential for building and repairing tissues.
– Lower Fat Content: Air frying reduces the fat content significantly compared to traditional frying methods, making it a healthier option without sacrificing flavor.
Comparison of Air-Fried Chicken Tenders vs. Traditional Fried
When comparing air-fried chicken tenders to their traditional fried counterparts, the differences become clear:
– Caloric Difference: Air-fried chicken tenders typically contain fewer calories due to the reduction in oil used during cooking.
– Fat Content: Traditional frying can add significant amounts of saturated fat, while air frying uses minimal oil, making it a heart-healthier choice.
Highlighting the Recipe’s Suitability for Various Diets
This recipe is a great fit for various diets. The air frying method makes it suitable for those looking to cut down on fat, while the high protein content makes it ideal for fitness enthusiasts. Additionally, by adjusting the breading, you can easily cater to gluten-free diets by using gluten-free flour and breadcrumbs.
Conclusion
Crispy air fryer chicken tenders are a delightful and healthier alternative to traditional fried chicken, offering a satisfying crunch with every bite. With the right techniques for coating, air frying, and dipping sauces, you can elevate this dish to new culinary heights. We encourage you to try this recipe and experience the benefits of air frying firsthand.
Enjoy the ease of making homemade chicken tenders that are not only delicious but also versatile enough to adapt to any occasion. Whether served as a meal or a snack, these chicken tenders are sure to become a favorite in your household. So gather your ingredients and get cooking—your taste buds will thank you!