
Irresistible No-Bake Fudge Brownie Bites
Introduction
No-bake desserts have surged in popularity over the past few years, captivating dessert lovers with their convenience and delightful flavors. Perfect for those who crave something sweet without the fuss of baking, these treats provide a quick fix for chocolate cravings and are often healthier than their oven-baked counterparts. Among the plethora of no-bake options, the Irresistible No-Bake Fudge Brownie Bites stand out as a particularly enticing choice. These luscious bites not only deliver the rich, chocolaty goodness that traditional brownies offer but also present a healthier alternative that can be enjoyed guilt-free.
What sets these brownie bites apart is their simplicity and speed of preparation. Made with wholesome ingredients, they are perfect for any occasion—be it a last-minute gathering, a mid-week treat, or a wholesome snack for the kids. The best part? You can whip them up in no time, making them an ideal dessert to have in your repertoire.
Understanding the Ingredients
To create these no-bake fudge brownie bites, it’s essential to understand the role each ingredient plays, not only in flavor but also in nutrition. Here’s a closer look at the key components that make these bites so irresistible.
Nuts as a Base
The foundation of our no-bake fudge brownie bites is nuts, specifically walnuts or pecans. These nuts are not just a crunchy addition; they serve as a nutrient-dense base that provides healthy fats and protein. Walnuts, for instance, are rich in omega-3 fatty acids, which are beneficial for heart health, while pecans are loaded with antioxidants and vitamins. Both options add a delightful texture to the brownie bites, offering a satisfying crunch that complements the smoothness of the other ingredients.
The Sweetness of Medjool Dates
For sweetness, we turn to Medjool dates, nature’s candy. These succulent fruits are packed with natural sugars and are an excellent alternative to refined sugars. Medjool dates not only provide a rich, caramel-like sweetness but also contribute a significant amount of dietary fiber, which aids in digestion and promotes a feeling of fullness. By using these dates, we can achieve a perfectly sweet flavor profile while keeping the bites wholesome and nutritious.
Cacao Powder vs. Cocoa Powder
When it comes to the chocolatey essence of these brownie bites, the choice between cacao powder and cocoa powder is crucial. Cacao powder is made from raw cacao beans and is less processed than cocoa powder, retaining more of its natural nutrients and antioxidants. This means that cacao powder is often richer in flavor and offers more health benefits, including improved heart health and enhanced mood. For the best results, opting for high-quality cacao powder will elevate the taste of your brownie bites, making them truly indulgent.
Natural Sweeteners: Maple Syrup and Honey
To further enhance the sweetness, we have the option of using either maple syrup or honey. Both natural sweeteners bring their unique flavor profiles to the table. Maple syrup offers a distinct, earthy sweetness with a hint of caramel, while honey provides a floral note that can elevate the overall taste of the brownie bites. Additionally, both sweeteners come with their own set of health benefits—maple syrup is rich in antioxidants, and honey has natural antibacterial properties. Depending on your preference or dietary restrictions, either sweetener can be used to achieve that perfect balance of sweetness.
The Role of Vanilla Extract and Sea Salt
No dessert is complete without a touch of vanilla extract, and these brownie bites are no exception. Vanilla extract adds depth and warmth to the flavor, making the chocolate taste even more pronounced. Meanwhile, a pinch of sea salt is crucial for balancing out the sweetness. Salt enhances flavors, ensuring that the sweetness from the dates and the sweeteners does not overpower the rich, chocolaty notes of the cacao.
Dark Chocolate Chips
Finally, we can’t forget the dark chocolate chips that add a delightful burst of chocolatey goodness to each bite. Dark chocolate is not only a delicious addition but also comes with a myriad of health benefits, including improved heart health and brain function. For those looking to keep their treats dairy-free, there are many options available for dairy-free dark chocolate chips. The rich flavor of dark chocolate elevates these brownie bites to a new level of indulgence, making them a truly irresistible treat.
Step-by-Step Instructions for Making No-Bake Fudge Brownie Bites
Now that we’ve explored the ingredients, it’s time to dive into the preparation of these delectable no-bake fudge brownie bites. The process is straightforward, ensuring that even novice bakers can create a batch of these treats with minimal effort. Here’s how to make them:
1. Prepare Your Ingredients: Gather all your ingredients: walnuts or pecans, Medjool dates, cacao powder, maple syrup or honey, vanilla extract, sea salt, and dark chocolate chips. Ensure your nuts are raw and unsalted for the best results.
2. Process the Nuts: In a food processor, add your choice of nuts. Pulse them until they reach a fine meal consistency, being careful not to over-process to the point of nut butter.
3. Add Medjool Dates: Next, remove the pits from the Medjool dates and add them to the food processor. Pulse until the mixture begins to clump together.
4. Incorporate Cacao Powder and Sweeteners: Add the cacao powder, maple syrup or honey, vanilla extract, and sea salt to the nut and date mixture. Pulse again until all ingredients are thoroughly combined. You should have a thick, sticky mixture that holds together when pressed.
5. Fold in Dark Chocolate Chips: Transfer the mixture to a bowl and fold in the dark chocolate chips. This will add pockets of melty chocolate throughout the brownie bites.
6. Shape the Brownie Bites: Using your hands, form small balls or bites from the mixture. Aim for about one-inch sized pieces to create the perfect bite-sized treat.
7. Chill and Set: Place the brownie bites on a parchment-lined tray and refrigerate them for at least 30 minutes. This helps them firm up and enhances the flavors.
With these steps, you’ll have a batch of delicious no-bake fudge brownie bites ready to enjoy. These treats are not only quick to prepare but also a wholesome alternative to traditional brownies, making them a must-try for any chocolate lover. Stay tuned for the next part of the article, where we will explore variations and tips to customize your brownie bites to suit your taste preferences.
Prep the Nuts
To achieve the perfect texture for your no-bake fudge brownie bites, it’s essential to properly process the nuts. Start with raw nuts such as walnuts or almonds, as they provide a rich flavor and healthy fats. Place the nuts in a food processor and pulse them until they resemble a coarse flour. Be cautious not to over-process, as this can lead to nut butter, which will alter the consistency of your brownie mixture. Aim for a fine crumb that still has some texture, helping to create a chewy and satisfying base for your bites.
Once processed, transfer the nuts to a mixing bowl and set them aside while you prepare the other ingredients. This step ensures that your nuts are ready to blend seamlessly into the brownie mixture, enhancing both flavor and nutrition.
Add Dates for Sweetness and Stickiness
Dates are a crucial ingredient in these brownie bites, providing natural sweetness and a sticky texture that helps bind the mixture. When selecting dates, Medjool dates are highly recommended for their rich flavor and soft consistency. Begin by pitting the dates and chopping them into smaller pieces to facilitate blending.
Add the chopped dates to the food processor with the processed nuts. Pulse the mixture until the dates are well integrated and the mixture starts to clump together. If the mixture appears too dry, you can add a splash of water or a tiny bit of nut milk to help it come together. The goal is to achieve a cohesive mixture that holds its shape when squeezed. This step is vital for ensuring that your brownie bites maintain their form and have a delightful chewiness.
Incorporate Flavors for Depth
To elevate the flavor profile of your no-bake fudge brownie bites, it’s important to incorporate additional ingredients that will bring depth and richness. Consider adding a few tablespoons of unsweetened cocoa powder for that classic brownie taste. You might also include a splash of vanilla extract to enhance the overall flavor.
Mix these ingredients into your nut-date mixture, pulsing until all components are well combined. You should aim for a dough-like consistency that is moist yet firm enough to hold its shape. Taste the mixture; if you prefer a sweeter flavor, feel free to add a touch of maple syrup or agave nectar. Achieving the right balance of flavors at this stage is key to ensuring your brownie bites are irresistibly delicious.
Melting Chocolate
Melting chocolate is an essential step in creating the rich coating for your brownie bites. To do this safely and evenly, use a double boiler method or a microwave. If using the microwave, break the chocolate into small pieces and place it in a microwave-safe bowl. Heat it in short bursts of 20-30 seconds, stirring in between until the chocolate is completely melted and smooth.
Be careful to avoid overheating the chocolate, as this can cause it to seize. If you notice any lumps or graininess, a small addition of coconut oil or vegetable shortening can help restore its silky texture. Once melted, allow the chocolate to cool slightly before combining it with your brownie mixture. This step will prevent the heat from affecting the texture of the dough.
Combining Ingredients
Now that you have both your brownie mixture and melted chocolate ready, it’s time to combine them for a rich flavor explosion. Pour the melted chocolate into the bowl with the brownie mixture. Use a spatula to fold them together gently, ensuring that the chocolate is evenly distributed throughout the mixture.
Be careful not to over-mix; just enough folding to create a uniform color and texture is ideal. You should end up with a thick, fudgy mixture that is still pliable. If the mixture feels too warm, you can refrigerate it for a few minutes to help it firm up slightly before shaping.
Shaping the Bites
With your brownie mixture fully combined, it’s time to shape the bites. Use a small cookie scoop or your hands to portion out the mixture. Aim for about a tablespoon per bite for a manageable size. Roll each portion between your palms to form a smooth ball, ensuring that they are tightly packed to hold their shape.
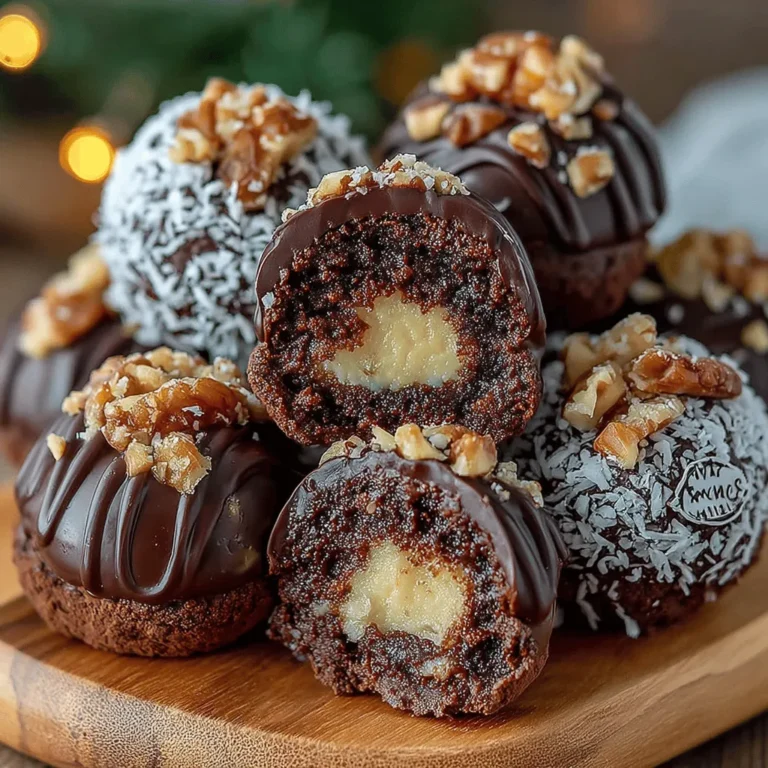
If desired, you can roll your brownie bites in toppings for added texture and flavor. Some popular options include shredded coconut, chopped nuts, or cocoa powder. This not only enhances the visual appeal but also adds an extra layer of taste. Once shaped, place the bites on a parchment-lined baking sheet or a plate.
Chilling for the Perfect Texture
After shaping your brownie bites, it’s crucial to chill them for the best texture and flavor melding. Place the bites in the refrigerator for at least 30 minutes. This chilling period allows the chocolate to set and the flavors to develop, resulting in a firmer and more cohesive treat.
While these brownie bites can be enjoyed immediately, the chilling process enhances their fudgy consistency and makes them easier to bite into. If you’re in a hurry, you can also freeze them for about 15 minutes, but be cautious not to leave them in too long, as they can become too hard.
Serving and Storing No-Bake Fudge Brownie Bites
Presentation Ideas
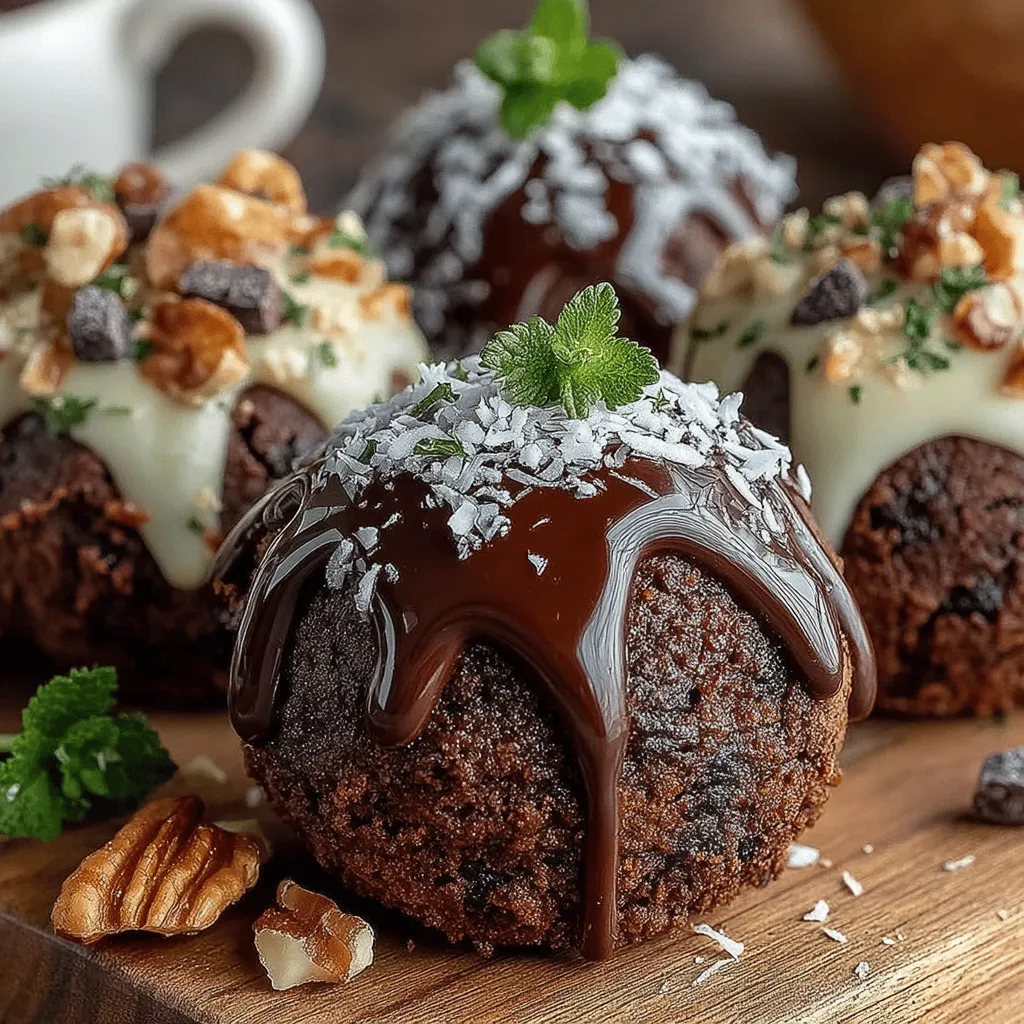
When it comes to serving your no-bake fudge brownie bites, presentation can make all the difference. Consider arranging them on a decorative platter, garnished with a sprinkle of cocoa powder or shredded coconut for an elegant touch. You can also serve them in mini cupcake liners for individual servings, making them a delightful addition to parties or gatherings.
For an extra special treat, pair the brownie bites with fresh fruits like strawberries or raspberries, which provide a refreshing contrast to the rich chocolate. Drizzling melted chocolate or a homemade chocolate sauce over the top can also enhance their visual appeal and flavor.
Storage Tips
To maintain the freshness and flavor of your no-bake fudge brownie bites, proper storage is key. Store them in an airtight container in the refrigerator for up to one week. If you want to extend their shelf life, you can freeze them; simply layer them between sheets of parchment paper in an airtight container. They can last in the freezer for up to three months.
When you’re ready to enjoy a frozen bite, simply remove it from the freezer and allow it to thaw at room temperature for a few minutes before indulging. This way, you can have a delicious treat on hand whenever the craving strikes.
Nutritional Benefits of No-Bake Fudge Brownie Bites
These no-bake fudge brownie bites are not just delicious; they also offer several nutritional benefits thanks to their wholesome ingredients. Nuts provide healthy fats, protein, and essential nutrients, while dates deliver natural sweetness along with fiber and antioxidants. Cacao powder is rich in flavonoids, which can promote heart health and improve mood.
This dessert is suitable for various dietary needs, including vegan and gluten-free diets, making it a versatile treat for everyone to enjoy. By using natural ingredients, these brownie bites can satisfy your sweet tooth while still aligning with a balanced diet.
Conclusion
In summary, no-bake fudge brownie bites are the perfect quick and healthy dessert option for any occasion. Their rich, fudgy texture, combined with the natural sweetness of dates and the satisfying crunch of nuts, makes them an irresistible treat. Easy to prepare and customize, these bites are not only delicious but also a wholesome alternative to traditional desserts.
Encourage your friends and family to try making these bites, as they can be tailored to suit various tastes and dietary preferences. Whether you’re enjoying them as a snack, dessert, or a post-workout treat, these no-bake fudge brownie bites are sure to impress. So roll up your sleeves and give this delightful recipe a try—you won’t regret it!
